
Step-by-Step Victoria Sponge Cake Guide for Beginners 2026
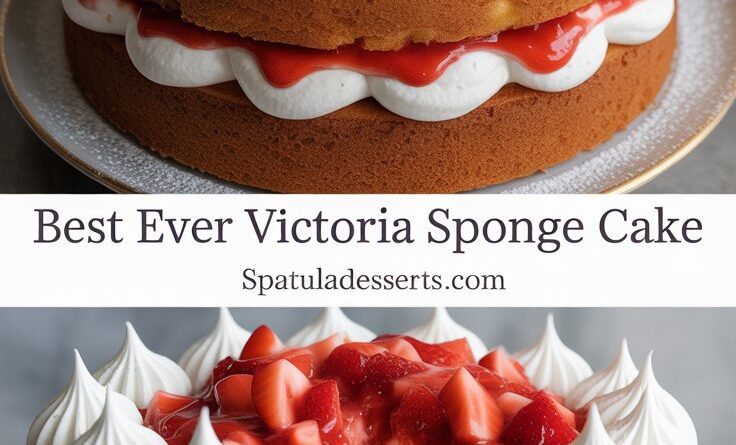
Victoria Sponge Cake is a timeless British dessert known for its light, fluffy texture, delicate sweetness, and versatility. Perfect for celebrations, afternoon teas, or simply as a delightful treat at home, this cake combines airy sponge layers with luscious jam and whipped cream. Mastering a Victoria Sponge Cake is not only about following a recipe; it’s about understanding ingredients, techniques, and the subtle art of baking. This guide will take you step by step through everything you need to know—from choosing the best ingredients to creating the perfect layers, tips for beginners, advanced techniques, serving suggestions, variations, and even storage methods. By the end, you’ll be confident in creating a Victoria Sponge Cake that is both delicious and visually stunning.
Why You’ll Love This Victoria Sponge Cake
There are countless reasons why the Victoria Sponge Cake remains a beloved dessert across generations:
- Light and Fluffy Texture: The sponge layers are airy, soft, and melt in your mouth, creating the perfect balance with sweet fillings.
- Simple Ingredients: Made from staple pantry ingredients like flour, butter, eggs, sugar, and milk, it’s easy to prepare yet elegant.
- Versatility: Classic strawberry or raspberry jam and whipped cream can be swapped for lemon curd, chocolate ganache, or mascarpone for different flavors.
- Ideal for Any Occasion: Whether you’re hosting an afternoon tea, a birthday, or a holiday gathering, this cake is sure to impress.
- Learning Baking Skills: Making a Victoria Sponge teaches essential baking techniques, such as creaming butter and sugar, folding batter, and whipping cream to perfection.
Ingredients You’ll Need
For a classic 8-inch two-layer Victoria Sponge Cake, gather the following ingredients:
- All-Purpose Flour: 1 cup (120g), sifted to ensure lightness
- Baking Powder: 1 teaspoon, fresh for best rise
- Unsalted Butter: ½ cup (115g), room temperature for smooth creaming
- Granulated Sugar: ¾ cup (150g), to achieve perfect sweetness
- Eggs: 2 large, at room temperature
- Whole Milk: ¼ cup (60ml), to adjust batter consistency
- Vanilla Extract: 1 teaspoon, pure for rich flavor
- Jam: Strawberry or raspberry, for filling
- Whipped Cream: 1 cup (240ml), lightly sweetened for filling
Optional Ingredients:
- Lemon zest for a fresh citrus twist
- Almond extract for a nutty flavor
- Powdered sugar for dusting
Tips for Ingredients:
- Always use room-temperature eggs and butter. Cold ingredients can create a dense cake rather than a light sponge.
- Sifting flour aerates it and helps achieve a tender crumb.
- Choose high-quality unsalted butter; it enhances flavor and texture.
Step-by-Step Instructions for Baking the Perfect Cake
Step 1: Preheat the Oven
- Preheat your oven to 350°F (175°C).
- Grease two 8-inch round cake pans with butter or non-stick spray.
- Line the bottoms with parchment paper to prevent sticking.
Step 2: Cream Butter and Sugar
- In a large mixing bowl, cream together the butter and sugar until pale and fluffy.
- Use an electric mixer on medium speed for about 3–4 minutes.
- This step incorporates air into the batter, giving your sponge a light texture.
Step 3: Add Eggs
- Beat in eggs one at a time, mixing thoroughly after each addition.
- Adding eggs gradually ensures the mixture does not curdle and retains a smooth texture.
Step 4: Combine Dry Ingredients
- In a separate bowl, whisk together the flour and baking powder.
- Gradually fold the dry mixture into the wet ingredients, alternating with milk.
- Mix gently until just combined; small lumps are okay. Overmixing can make the sponge tough.
Step 5: Divide and Bake
- Divide the batter evenly between the prepared pans.
- Smooth the tops with a spatula for even baking.
- Bake for 25–30 minutes or until golden brown. A toothpick inserted in the center should come out clean.
Step 6: Cool and Layer
- Allow cakes to cool in the pans for 10 minutes.
- Transfer to a wire rack to cool completely.
- Once cooled, spread a generous layer of jam on one sponge layer, followed by whipped cream.
- Place the second sponge on top and lightly dust with powdered sugar, if desired.
Advanced Tips and Tricks for a Professional Result
- Even Baking: Rotate your pans halfway through baking to ensure even color and texture.
- Whipping Cream Perfectly: Chill your mixing bowl and beaters before whipping cream; this helps achieve stiff peaks faster.
- Prevent Sinking: Avoid opening the oven door during the first 20 minutes of baking.
- Storage: Keep leftover cake in an airtight container at room temperature for up to 3 days. For longer storage, wrap in plastic and refrigerate up to 7 days.
- Reheating: Warm individual slices in the microwave for 10–15 seconds or in the oven at 350°F (175°C) wrapped in foil for 5–10 minutes.
Filling and Topping Variations
- Classic Strawberry Jam and Whipped Cream: Traditional and crowd-pleasing.
- Raspberry Jam with Mascarpone: Adds richness and subtle tang.
- Lemon Curd: Perfect for a citrusy twist.
- Chocolate Ganache or Nutella: For chocolate lovers.
- Fresh Fruit: Berries, kiwi, or peaches create a vibrant topping.
- Seasonal Options: Pumpkin puree with cinnamon in autumn or tropical fruits in summer.
Serving Suggestions
- Pair with a cup of Earl Grey tea or freshly brewed coffee for an authentic experience.
- Slice with a serrated knife to preserve the delicate sponge layers.
- Decorate with edible flowers or fresh berries for festive occasions.
- Use a cake stand for elegant presentation.
Frequently Asked Questions (FAQs)
1. How long does Victoria Sponge Cake last?
- Up to 3 days at room temperature in an airtight container, up to a week in the fridge.
2. Can I make it gluten-free?
- Yes, substitute flour with a gluten-free blend, but baking times may vary.
3. Can I make it vegan?
- Use plant-based butter, non-dairy milk, and egg replacers. Texture will be slightly different but still delicious.
4. Can I freeze the cake?
- Yes, freeze unfilled sponge layers wrapped tightly in plastic wrap for up to 2 months. Thaw before layering.
5. What’s the best way to avoid a dense cake?
- Ensure all ingredients are at room temperature, cream butter and sugar well, and fold the batter gently.
History and Fun Facts About Victoria Sponge Cake
- Named after Queen Victoria, who enjoyed sponge cakes with her afternoon tea.
- Originally baked with a single layer, the two-layer version became popular later.
- The classic version uses simple ingredients but can be elevated with creative fillings.
- Victoria Sponge Cake is often called the “workhorse” of British baking for its simplicity and versatility.
Health and Nutrition Information
- Calories per slice: ~320 kcal
- Sugar: 20g
- Fat: 15g (Saturated: 9g)
- Protein: 4g
- Carbohydrates: 43g
- Tips for a lighter version: use low-fat cream, reduce sugar slightly, or substitute half the flour with almond flour.
Conclusion – Baking Mastery Made Simple
Mastering a Victoria Sponge Cake is more than following a recipe—it’s about understanding baking techniques, ingredient quality, and presentation. By using room-temperature ingredients, careful mixing, precise measurements, and thoughtful layering, you can create a cake that is light, airy, and irresistibly delicious. Once comfortable with the classic recipe, experiment with different jams, creams, and toppings to create a cake that is uniquely yours. With patience and practice, you’ll soon serve a Victoria Sponge Cake that looks as beautiful as it tastes, perfect for any celebration or cozy afternoon tea.