
Delightful Pot of Gold Rainbow Cake Recipe: A Step-by-Step Guide 2025-26
Creating a Pot of Gold Rainbow Cake is more than just baking; it’s crafting a masterpiece that brings joy, color, and flavor to any celebration. With its vibrant layers, fluffy frosting, and a touch of golden magic, this cake is designed to impress both visually and gastronomically. Whether you’re a beginner or an experienced baker, this guide will walk you through everything—from ingredients and preparation to tips for perfect layers and creative presentation.
Why the Pot of Gold Rainbow Cake is a Must-Try Dessert
The Pot of Gold Rainbow Cake isn’t just a dessert; it’s a celebration in every slice. Here’s why you’ll love it:
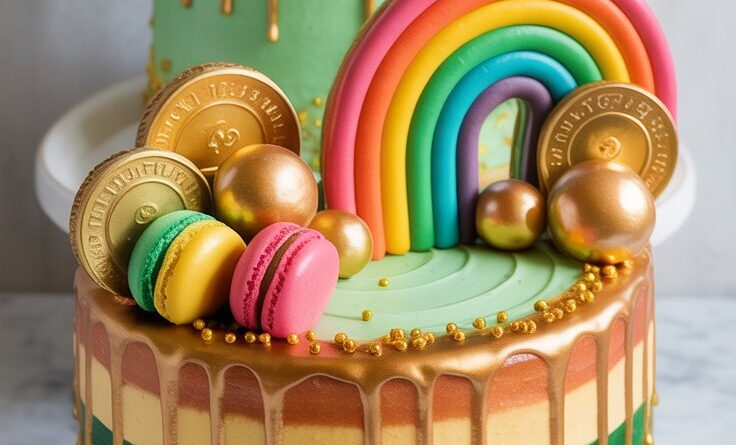
- Vibrant Visual Appeal: Each layer showcases the colors of the rainbow, making it a show-stopping centerpiece for birthdays, holidays, and special events.
- Flavorful Layers: Beyond its appearance, the cake offers a perfect balance of sweetness, moisture, and buttery richness.
- Fun Baking Experience: Involving family and friends in creating and decorating this cake makes baking an engaging activity.
- Versatility: Pair it with ice cream, berries, or whipped cream for an even more indulgent dessert experience.
Ingredients for Pot of Gold Rainbow Cake
To make this cake, you’ll need high-quality ingredients to ensure the best flavor and texture.
Cake Ingredients:
- 2 ½ cups cake flour – For a soft, tender crumb.
- 2 ½ tsp baking powder – Ensures the layers rise perfectly.
- 1 ¾ cups granulated sugar – Adds sweetness and structure.
- ¾ cup unsalted butter, softened – Brings richness and moisture.
- 5 large eggs – Contributes to structure and texture.
- 1 cup whole milk – Adds moisture and richness.
- Gel food coloring – Use vibrant colors for each layer.
Frosting Ingredients:
- 2 cups unsalted butter, softened
- 6 cups powdered sugar
- 1 tsp vanilla extract
- 4–6 tbsp milk or heavy cream
- Optional: Edible glitter or gold dust for decoration
Step-by-Step Instructions
Follow these steps carefully for a flawless, colorful, and moist cake.
Step 1: Preheat and Prepare
- Preheat your oven to 350°F (175°C).
- Grease three 8-inch round cake pans with butter or non-stick spray, then line with parchment paper for easy removal.
Step 2: Mix Dry Ingredients
- In a medium bowl, whisk together cake flour, baking powder, and a pinch of salt.
- Set aside while you prepare the wet ingredients.
Step 3: Cream Butter and Sugar
- In a large mixing bowl, beat the softened butter and granulated sugar using an electric mixer until light and fluffy (about 3 minutes).
- This step ensures the cake has a soft, airy texture.
Step 4: Add Eggs and Milk
- Add eggs one at a time, mixing thoroughly after each addition.
- Pour in milk gradually while mixing to ensure a smooth, uniform batter.
Step 5: Combine Wet and Dry Ingredients
- Slowly add the dry ingredients to the wet mixture on low speed.
- Mix just until combined; small lumps are fine. Avoid overmixing, or the cake may become dense.
Step 6: Divide and Color Batter
- Divide the batter evenly into bowls based on the number of rainbow colors you want.
- Add gel food coloring gradually to each bowl until the desired shades are achieved.
Step 7: Bake the Layers
- Pour each colored batter into the prepared pans.
- Bake for 25–30 minutes, or until a toothpick inserted comes out clean.
- Let the layers cool completely on a wire rack before frosting.
Step 8: Prepare Frosting
- Beat unsalted butter until creamy.
- Gradually add powdered sugar, alternating with milk or cream, and beat until smooth.
- Add vanilla extract for flavor. Adjust consistency if needed.
Step 9: Assemble the Cake
- Place the first layer on a serving plate. Spread a generous layer of frosting.
- Repeat with remaining layers, stacking carefully to maintain alignment.
- Frost the top and sides, smoothing with a spatula.
- Optional: Sprinkle edible glitter or gold dust for a magical finishing touch.
Tips for Perfect Pot of Gold Rainbow Cake
- Use Room Temperature Ingredients: Cold butter or eggs can lead to uneven texture.
- Measure Accurately: Baking is a science; use cups and spoons or a kitchen scale.
- Even Layers: Rotate pans halfway during baking for consistent results.
- Avoid Overmixing: Overmixing can deflate the batter, producing a dense cake.
- Cool Completely: Frosting warm layers can cause it to melt and slide.
- Gel vs Liquid Coloring: Gel food coloring provides vibrant colors without changing batter consistency.
Creative Variations
- Gluten-Free Version: Substitute with a high-quality gluten-free flour blend.
- Chocolate Rainbow Cake: Add cocoa powder to one or two layers for a chocolate twist.
- Vegan Option: Use plant-based butter, milk alternatives, and flax eggs.
- Mini Cupcakes: Create rainbow cupcakes for easy serving and fun presentation.
Serving Suggestions
- Vanilla Ice Cream: Complements the rich, fluffy cake layers.
- Fresh Berries: Adds tartness and freshness.
- Whipped Cream: Adds lightness and extra indulgence.
- Party Table Display: Arrange slices on a tiered cake stand for maximum impact.
Storing and Make-Ahead Tips
- Make Ahead: Bake layers up to two days in advance; wrap in plastic wrap and store in an airtight container.
- Refrigeration: Keep assembled cake in the fridge up to 5 days.
- Freezing: Freeze individual slices for up to 3 months. Thaw at room temperature before serving.
- Reheating: Warm slices in the oven for 10–15 minutes for a fresh-baked feel. Avoid microwaving.
Common Mistakes and How to Avoid Them
- Overmixing Batter: Causes dense texture. Fold gently.
- Skipping Room Temperature Ingredients: Can affect rise and texture.
- Uneven Layers: Use cake strips or rotate pans.
- Stacking Warm Layers: Causes frosting to slide; cool completely first.
- Too Much Food Coloring: Can affect taste; start small and adjust gradually.
FAQs
Q1: What makes a Pot of Gold Rainbow Cake special?
A: Its vibrant colors, layered flavors, and whimsical appearance make it a dessert that’s both visually stunning and delicious.
Q2: Can I use a boxed cake mix?
A: Yes! Opt for high-quality mixes and enhance them with gel colors to achieve rainbow layers.
Q3: How do I store leftovers?
A: Keep in an airtight container in the fridge for up to 5 days or freeze slices for long-term storage.
Q4: Can I make it gluten-free or vegan?
A: Absolutely. Use gluten-free flour blends or vegan substitutes for eggs, butter, and milk.
Q5: How do I get vibrant colors without affecting taste?
A: Use gel food coloring instead of liquid, and add gradually until the desired shade is achieved.
Final Thoughts
Creating the Pot of Gold Rainbow Cake is a rewarding experience that combines creativity, color, and flavor. By following the steps and tips in this guide, you’ll achieve a cake that’s visually stunning, delicious, and perfect for any celebration. From careful measurement and preparation to fun assembly and decoration, every stage contributes to a masterpiece that delights all ages.
Whether you stick to the classic recipe or experiment with variations, this cake promises joy in every slice, making it a centerpiece that will be remembered long after the last bite.